Skybadger Observatory
This is the website of Skybadger.net, dedicated to all aspects of Astronomy from the Skybadger observatory : observing, imaging, building instruments and getting results.
This is the website of Skybadger.net, dedicated to all aspects of Astronomy from the Skybadger observatory : observing, imaging, building instruments and getting results.
Astronomer and tinkerer, This site is about projects in Astronomy..
Bibliography.
This website is to record an interest in astronomy and share the results.
The background page attempts to explain why I am interested in astronomy and provides a potted history of astronomy experience and publications.
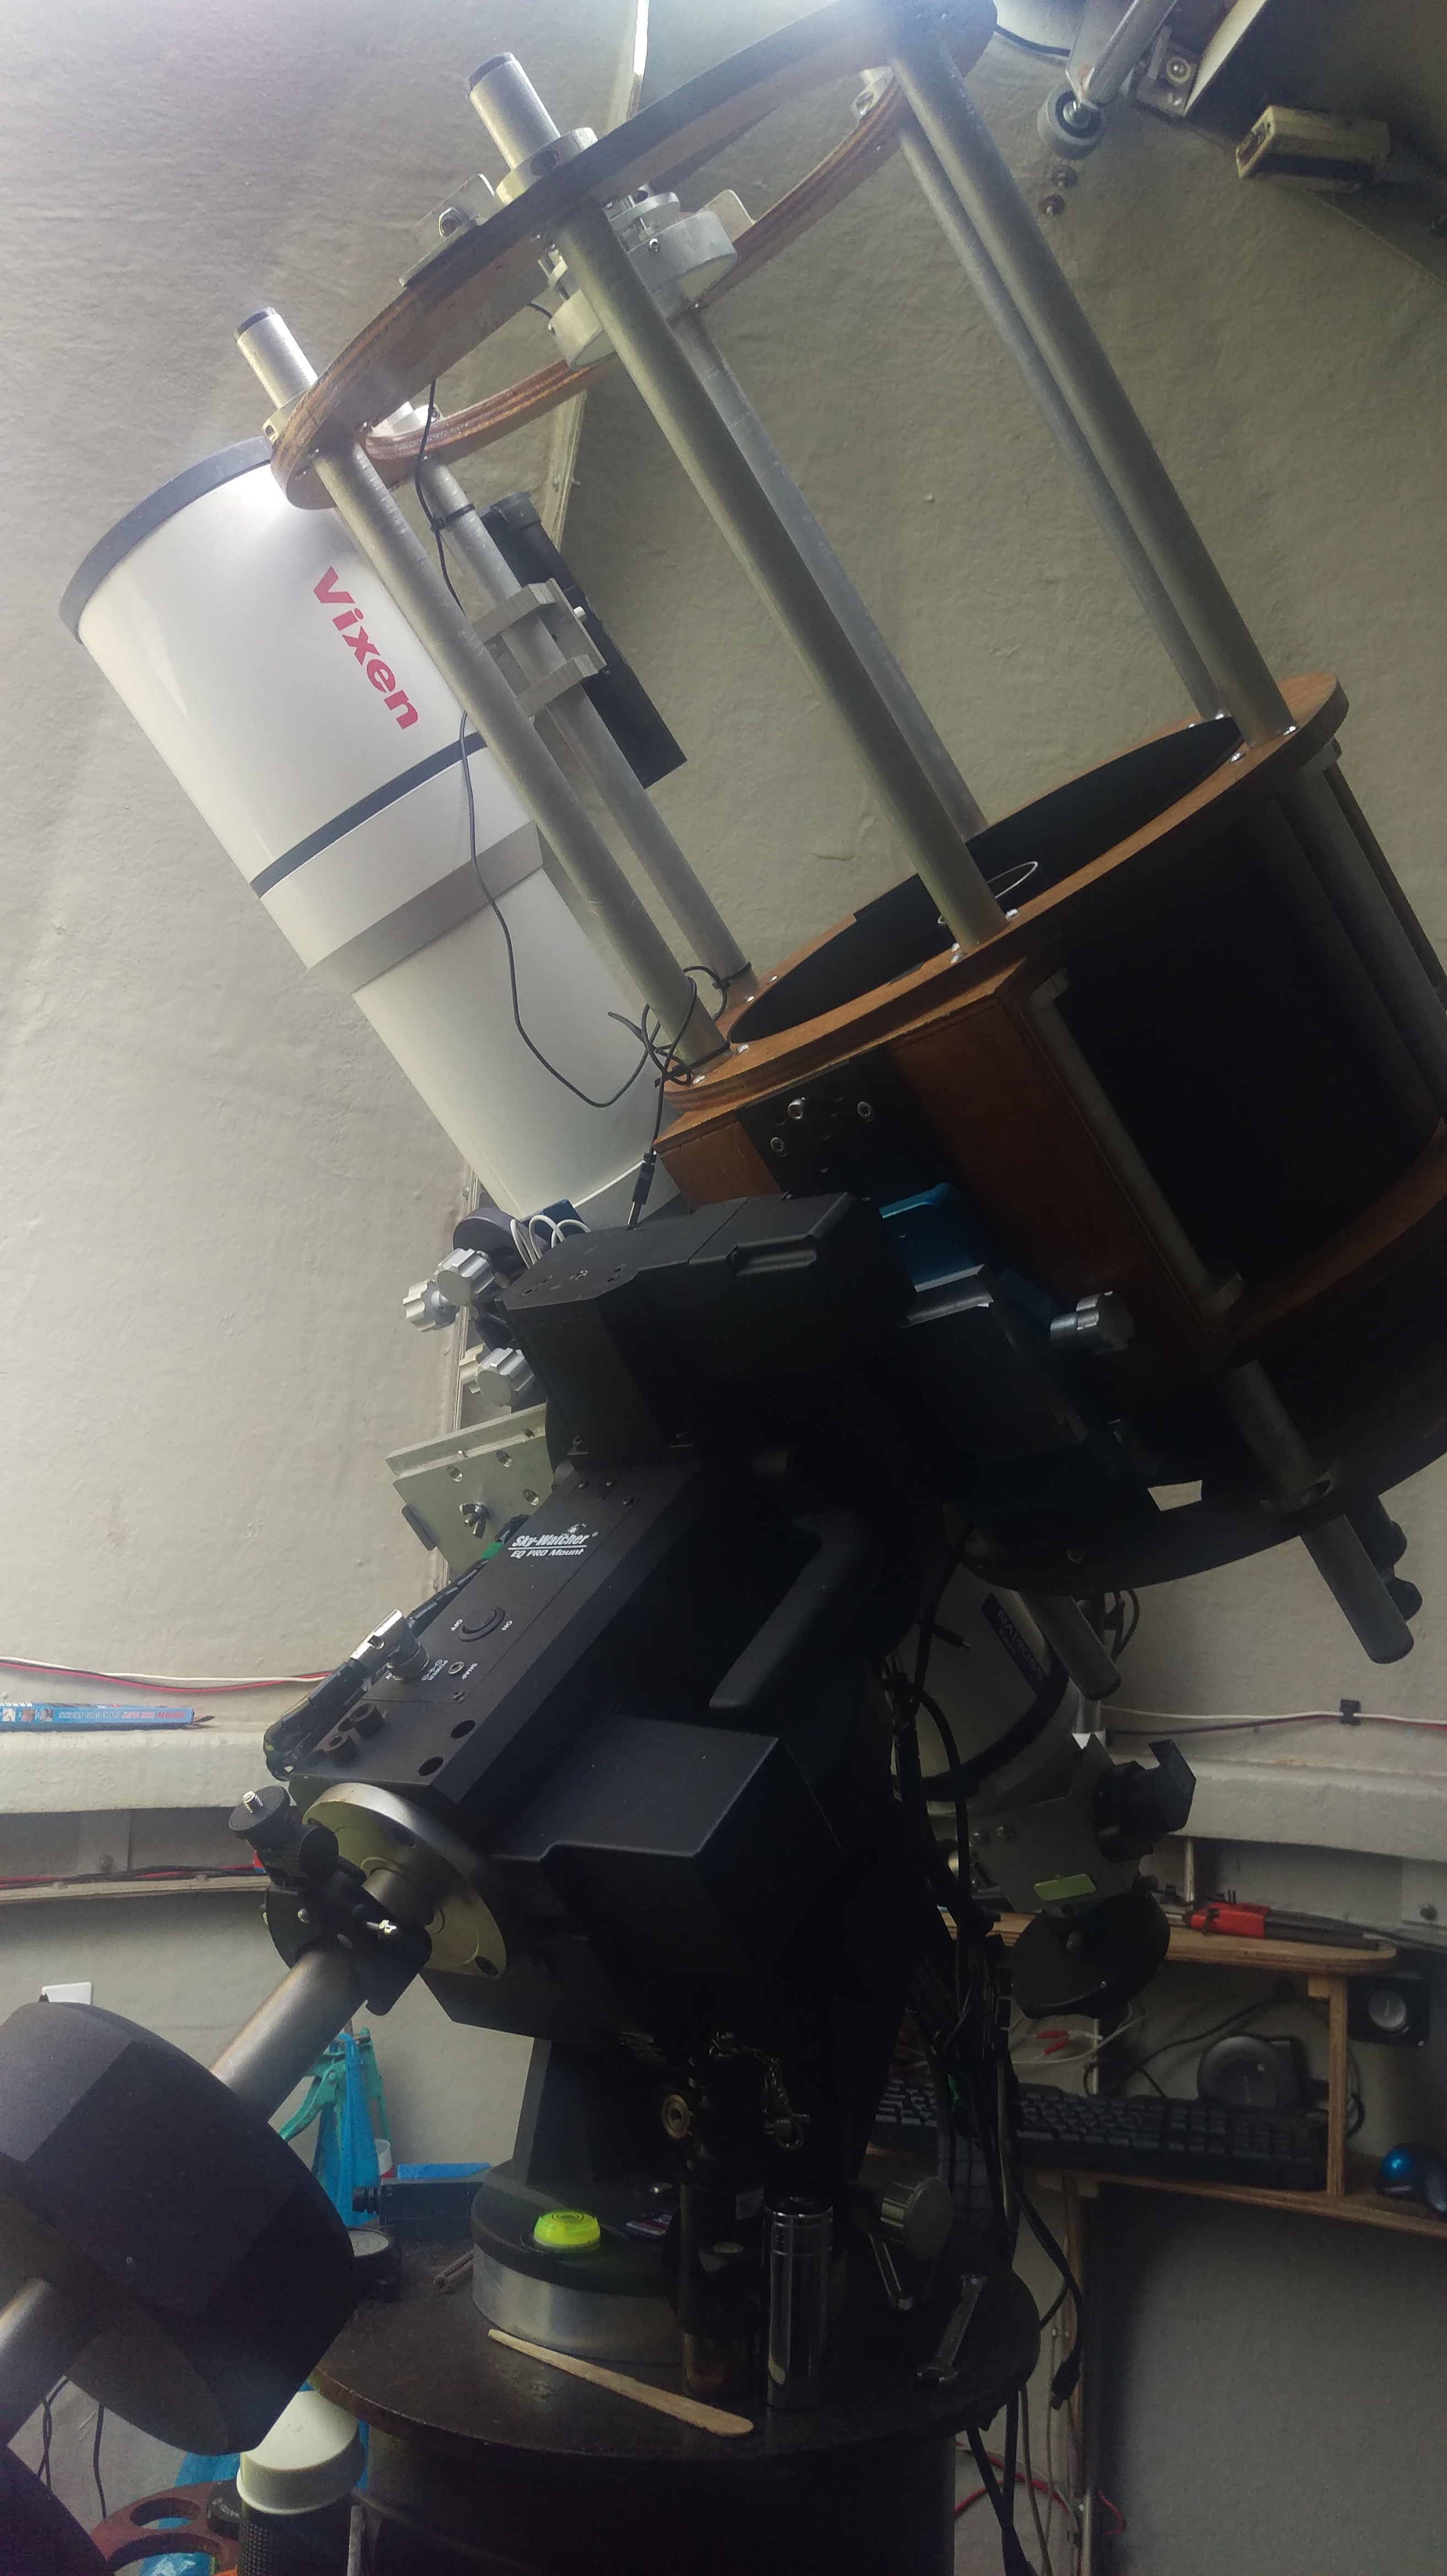
The equipment page more fully
describes the equipment I have, its limitations and why I use it.
The biggest
downside to astronomy as a hobby is that it can be very expensive, especially if you haven't got the time, the skill
or sometimes the equipment to make parts you need, you have to buy, beg or swap them ....
More time has passed. Commercial builders rockets are landing on the moon, (mostly sideways it must be said) low earth orbit satellites are being launched in their 1000's causing trails in all my pictures and global warming is (for me at least) making the weather warmer, wetter and cloudier than ever. The only way to handle this is to either go abroad with the telescope or automate the observatory way more than I imagined I would need. Projects are thus oriented around
... with Basingstoke Astro Soc Expeditions Group to the top of the mountain for a week meant getting all the mobile kit
assembled, tested and locked-down before travelling. What cabling would be reliable, what was the mnimum cable combination required, how do I control it overnight ?
How do I get it there safely in its minimal size combinatino and how do I trade off the flexibility of a large, heavy bag of spares with a nailed-down tested combination with no room for change ?
I do have a slight allergic reaction to the ASI Air since it doesn't easily handle other 3rd party kit and the PI server solutions don't quite do what I want,
so a local micro PC running Voyager on a harmonic mount was the approach taken.
In my mind every astronomer needs to be intimate with their tools, thats where I get a whole heap of entertainment from. For me this means learning and getting good at grinding telescope mirrors and understanding assembly, alignment and collimation of thosae optics at some depth. I've had a mirror-o-matic machine for some time and a 6" blank ground to f/5. Time to complete it, get my hands dirty in pitch and then work my way up to bigger mirrors. Lots of techniques to learn - foucault testing, ronchi testing, polishing on the machine and touching up. The 6" is now spherical in the centre but with turned down edge, so I need to restore it to a sphere and try again. I have 5 6" blanks, a few 8", a 10", 3 12" of varying thicknesses, a pierced 15" , a pierced 18" and a 22".
Having travelled with a small scope and a medium mount and sat there through the night shivering while it images, I wanted to take something I could use to do something visual in the glorious skies. There is a lot to be said to talking to the other astronomers that I went with but a nice 8" f/4 rich field scope would trumpt that and be the centre of attention. Add to that if it could be goto or at least push-to. Fab! So while I learn to grind mirrors, I will put thoe mirrors to use in portable alt-az scopes that I can sell or give away to schools and clubs. I have experience in automating an alt-az in the form of a skytee using OnStep so I hve adopted this to drive the other mounts as well.
Adoption of ASCOM ALPACA as base standard for all drivers to integrate the dome to a complete automated system. Pages are coming as they are written. Code is normally loaded to Skybadger github repository and is all based on ESP8266-01/-12 devices for Wifi and provide ASCOM platfrom integration usign the ALPACA remote client api which means they all appear as native ASCOM drivers, wherever they are. I have written code ( using Arduino IDE), built hardware, tested and integrated devices for :
| Driver | Coded | HW Built | Tested | Integrated | In Use | Link |
|---|---|---|---|---|---|---|
| Dome | Y | Y | Y | Y | Y | ESPDOM |
| Dome Shutter | Y | Y | Y | Y | Y | ESPDSH |
| Filter wheel | Y | Y | Y | N | ESPFW | |
| Focuser | Y | Y | ||||
| Switch (1,2) | Y | Y | Y | Y | Y | ESPASW |
| PWM Heater | Y | P | ESPHTR | |||
| SQM (1, 2) | Y | Y | Y | Y | Y | ESPSQM |
| SensorPack | Y | Y | Y | Y | Y | ESPSEN |
| Aurora Magnetometer | Y | Y | Y | Y | Y | ESPFGM |
| Encoder | Y | Y | Y | Y | Y | ESPENC |
| ADC/Voltmeter | N | Y | Y | Y | Y | Embedded into ESPASW Switch |
| Safety | Y | Y | Node-red ALPACA driver flow | |||
| Observing Conditions | Y | Y | Y | Y | Y | Node-red ALPACA driver flow |
| Wind | Y | Y | Y | Y | ESPWTR | |
| Rain | Y | Y | Y | Y | Y | ESPWTR |
| Flip-Flat (1,2,3) | Y | Y | Y | Y | Y | ESPACC |
| All Sky Camera | OEM | Y | Y | Y | Y | AllSkyEye |
and these are now all integrated into Node-Red which is a gui-based javascript (node.js) event processing engine with a very nice dashboard and editable nodes as event handlers.
The ASCOM driver for observing conditions and safety are implemented in Node-Red flows , which just shows its flexibility in providing http-bsed REST flows. Later additions will be things like calls out to Amazon web services for real time data processing, event checking, AI weather sensing and analytics.
If you are interested in the code and its all on Github but needs a tidy-up, then drop me a line to discuss
The way to getting Voyager to automate everything is to use the Robotarget feature of Voyager Advanced which provides an automation wrapper around the imaging sequences used to capture targets. I use the Dragscript scripting editor to provide a script which runs the observatory day-in and day-out, opening automatically after dark when clear to pickup from where it left off and then move on to the next target. Its the only way in UK weather to get enough hours.