![]()
Contents
IntroductionThis is my observatory build record I thought I'd share since there are always some things which are novel and worth repeating elsewhere. I had built a telescope OTA that turned out to be too big for my mount and dome together - I could get it on the mount but couldn't move it without snagging the dome. So I made the decision to sell the dome and make or buy a new one. I always prefer to make things but one came up on Ebay that was worth bidding for at the right price and, having fought off the competition, I made a trp down to Wiltshire to pick up a 2.7m second hand polaris glass-fibre dome. This is the existing building which has since moved to Birmingham... 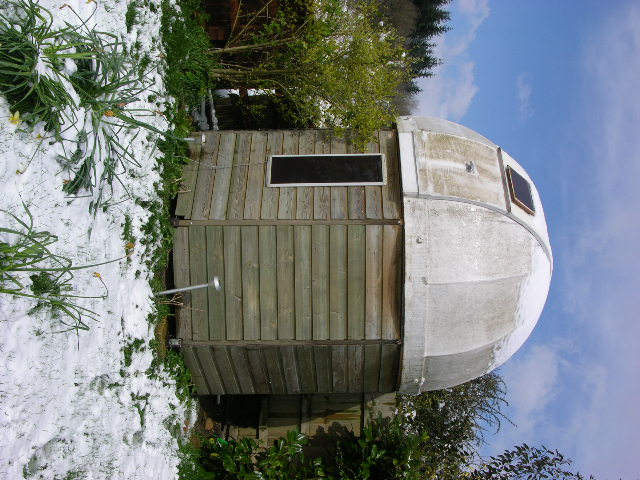
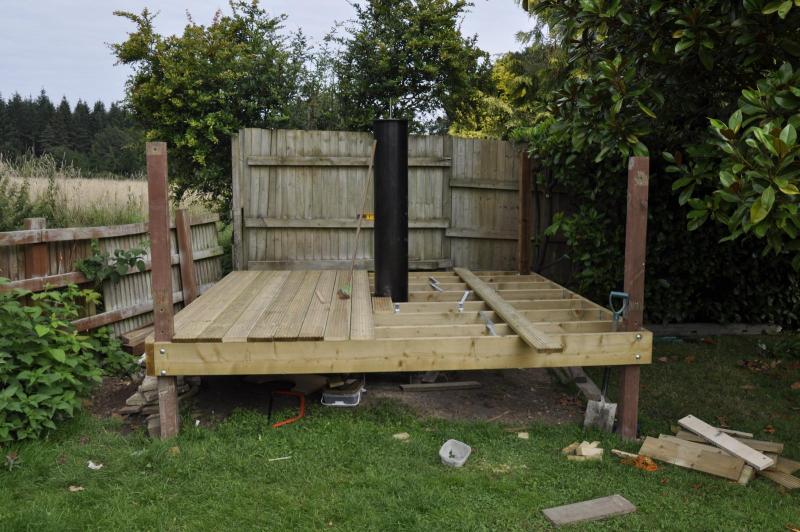
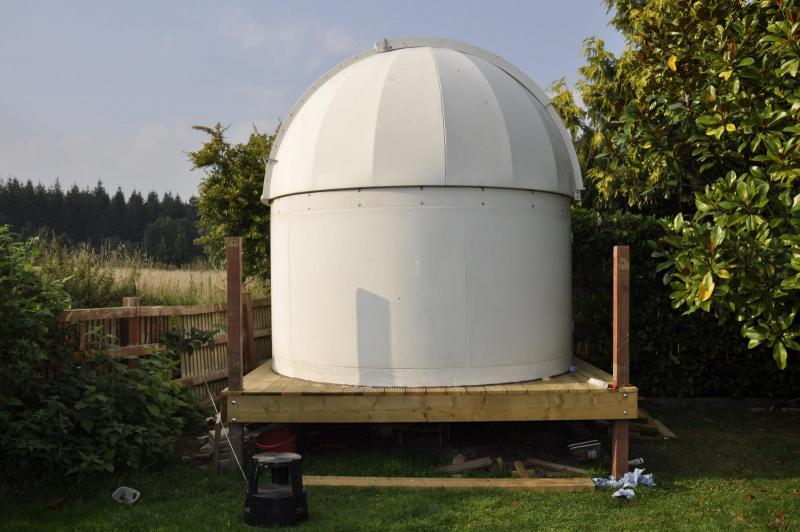
The replacement dome came down really easily into its component parts and into the truck. Cleaning up the parts from the silicon rubber used to seal it was another matter. I probably spent at least two afternoons using a pressure washer and eventually the falt blade from a plane as an effective means of removing the silicon. The dome then spent about two months sitting down the side alley in parts while I re-worked the plot. Being larger than the previous one in diameter, the concrete block the pier sat on had to be moved from the corner of the garden further in, to the new centre of the dome. Moreover, the dome walls of the polaris dome were half a metre shorter than the previous one. So I had to do something - either slice some height off my pier or raise the floor. Tee pier is a 12" tube of steel and I like it being tall to avoid the cricked neck syndrome. Also I didn't want to start slicing the end off or trying to cut a straight section out of the middle and re-welding. Quotes from companies were coming in at silly prices. So I raised the floor. After careful measurement and calculation, with some modelling of telescope size and dome clearances thrown in, I reckoned I needed to raise the floor by about 80 cm in the worst part of a slightly sloping garden. This was to be achieved by sinking 4 4x4" uprights in a square and laying decking on it.
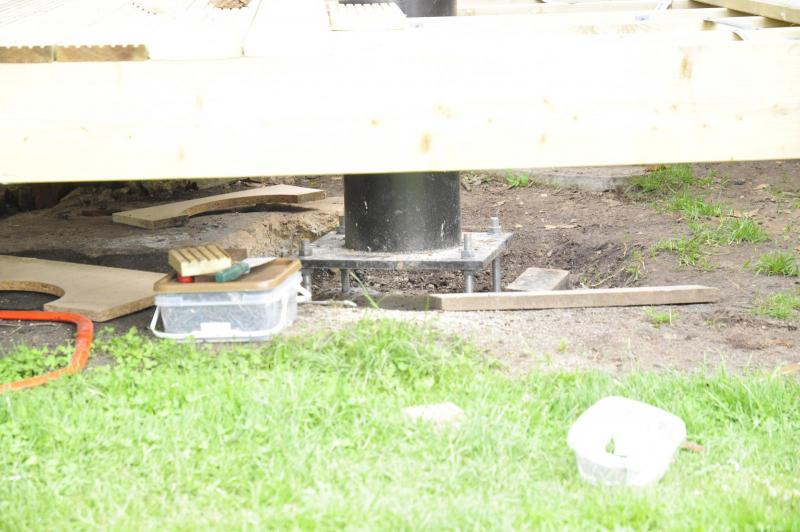
First I had to clear the existing concrete to allow a new pier block to be poured. out with the SDS drill and chisels and an hour later, with the use of a post hole digger, I have a 3' deep hole, 12" round with a 8" deep by 30" square flat slab excavated. The flat slab sides are framed with wood to hold the concrete when opoured and some rebar suk in the middle to reinforce the long stem. This is a smaller concrete pour than the last one. One big one had been enough to show me that its not really necessary to go massive as long as you go deep and stable. I recall 9 bags of ballast and 2 of cement and some postcrete I had lying around went into the hole, along with some brick ends etc to make up the space. The centre was marked by a bolt in the cement which was removed later. This bolt set into a hole in the base of the pier to allow easy marking of the base holes for drilling. The holes were drilled 25mm diameter by 8" deep for 20mm studding on a 18" square pattern. The alignment of the square around the centre mark was determined by sitting the pier level on the central stud and using a piece of studding bolted into the centre of the top of the pier, the length of the stud was adjusted by moving the bolts until Polaris just crested the top of the stud when viewed from the south reference mark on the top plate. Now I had the alignment, the pier was then placed on top with the studs bolted tight in it at full length while the mortar around the studs in their drilled holes set. The pier was essentially used both to locate the holes and to ensure that the bolts were all parallel as they set. Finally the pier was set to working height and accurately levelled.
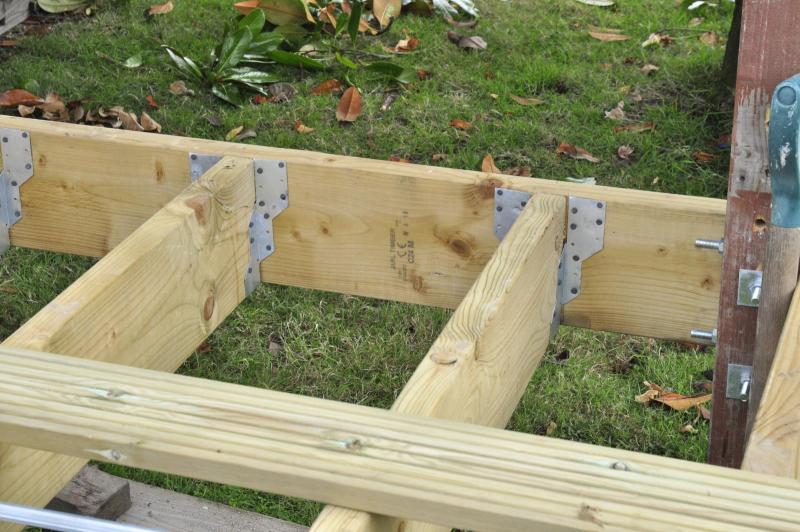
The four uprights were concreted in place on a square with 3m sides. Four 8" by 2" joists were bolted to these uprights using 9" bolts and fixing spikes, 2 bolts to each end, one joist to a side. Between these joists were fixed more joists using joist hangers on a 18" center spacing, except to allow enough space for the foot of the pier to be lifted through the floor, so there was a 20" spacing there between joist sides. I had been recommended to use joist ties rather than noggins. These went in really quickly and easily and stiffened the floor up significantly. The rest of the effort was just laying the 38mm redwod decking and screwing in 100s of screws. I eventually succumbed and bought myself a new drill to do the job with.
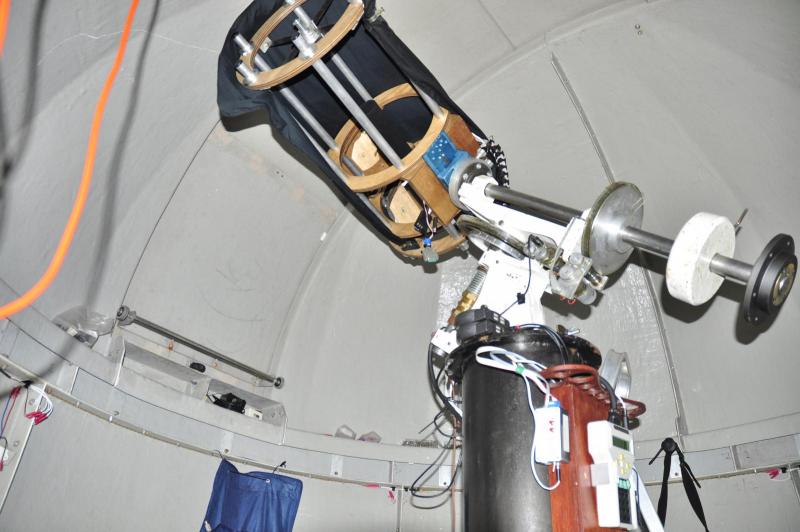
The dome went on next, we had to play with the foot ring, the wall ring and the topping ring, trying to work out the relevant positions until we twigged they were all related to the door position. Once we had that, the rest just fell into place. Thousands of bolts later, the component parts of the dome were all in place ready for sealing. The foot ring screwed to the deck, the bolts all tightened using the drill to torque and sealing mastic used to close the gaps for waterproofing. Finally the foot ring was sealed on the outside using window frame low modulus rubber. It flowed easily into the decking ruts and gaps and seems to have taken well. Sealing out the dew that rolls off the roof. Issues to face have been: The original concrete was set in the ground where a compost heap had been. It had all dried out and contracted 8 inches. Hence the ground level was 8" lower than expected once uncovered. So I had to lower the entire decking by 8" or the height of a joist, or build up the concrete 8" higher than expected. I chose to lower the joists since at that point I hadn't put anything more than the 4 side joists in. For power I put in a small frame to mount an external waterproof socket pair at the end of 50m or armoured cable from the house. This has an eight-way individually switched distribution board plugged in to power the computer, screen and ethernet-over-power adapter. I also cut a new hole in the pier at the top - so there is now a pair of 4" holes, front and back and a new one at the decking height. This all helps with cable management inside the pier. The internal lighting of the dome I copied from elsewhere - a 8m strip of red leds was fitted around the dome under the top ring, controlled using one of those Ebay PWM controllers. At the minimum setting it is still a touch bright so needs a limiting resistor in series. I also built a curved desk which hangs off the top ring bolts and carries a monitor stand pillar. This shelf supports another longer shelf below, where the keyboard, mouse and light controller sit. it all works rather well actually. If anything it needs to be bigger, with holes for eyepieces in and enough space for a log book.
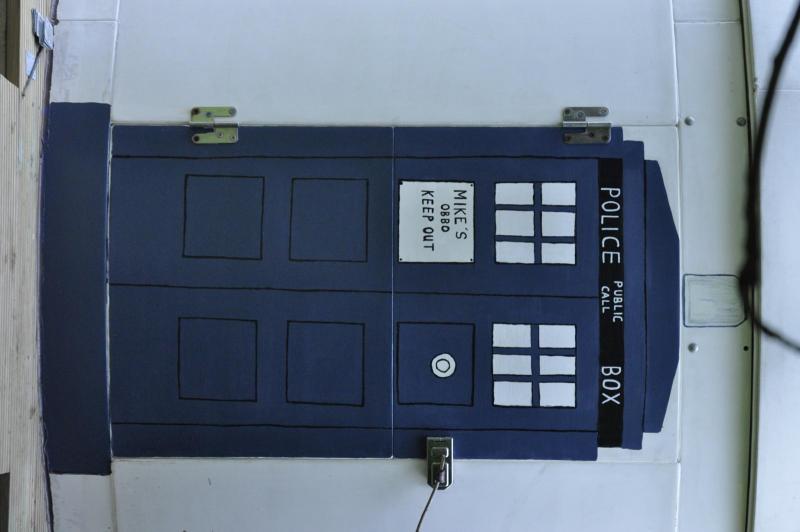
The final twiddles include: Remote desktop screen at the telescope pier, its a usb touchscreen to present CDC maps. Add electric lock/unlock to the dome shutter. Continuing work going forward: Motorise the dome for rotation. I am removing two side centering wheels and attaching them to motors to drive on the inner overhanging dome lip and writing a dome driver in c# under ASCOM. Motorise the roof shutter. Its an up-and-over two-part shutter which slides on teflon sliders but is quite heavy. I have an idea to use 1mm wire rope to pull it up to the slot top on a winch and pull it back using the same size wire running in bike wire sheath along the slot to the bottom where it pulls the shutter down when the winch is reversed. Illuminate the steps. Its dark there - I have bought a PIR sensor to detect people approaching and will use this to turn on leds under the steps for footing . Since the wife also painted the door (see down) I thought I would also add a sound player with tardis noise playing when triggered. Add an external scope mount on top of one of the uprights. So I can do visual while photographing in the dome.
Finally the insides...
|
|
![]()